
Hook and Weight
Plaster, mold-making, architectural design, 3D modeling


Materials
Plaster, chipboard, foamcore, hot glue


ARCH 287: Assembly

Skills
Rhino, chipboard modeling
Drafting begins with an exercise. representing 3D objects and forms.
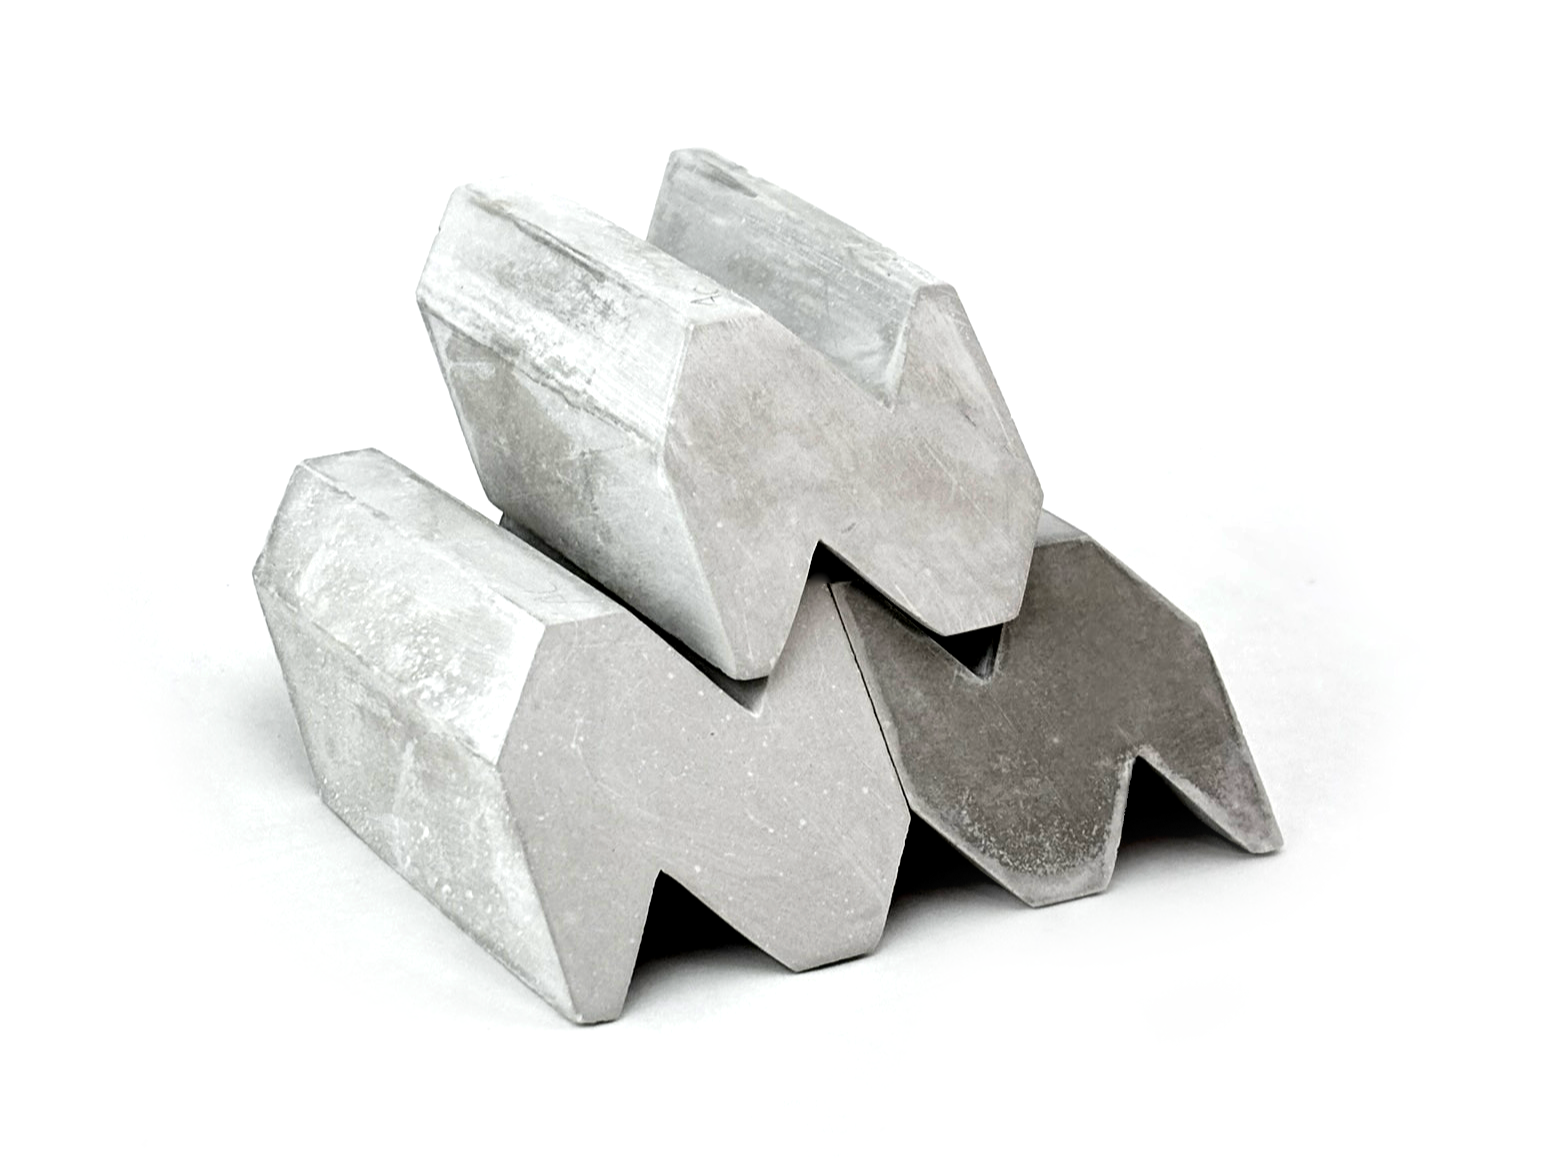
Ideation began with elementary geometric forms. The two points of contact on the base create stability and an even weight distribution.
Each unit relies on symmetry and gravity to stand in an aggregate. As the unit becomes 3-dimensional, we begin to consider how the piece might stand in different orientations.
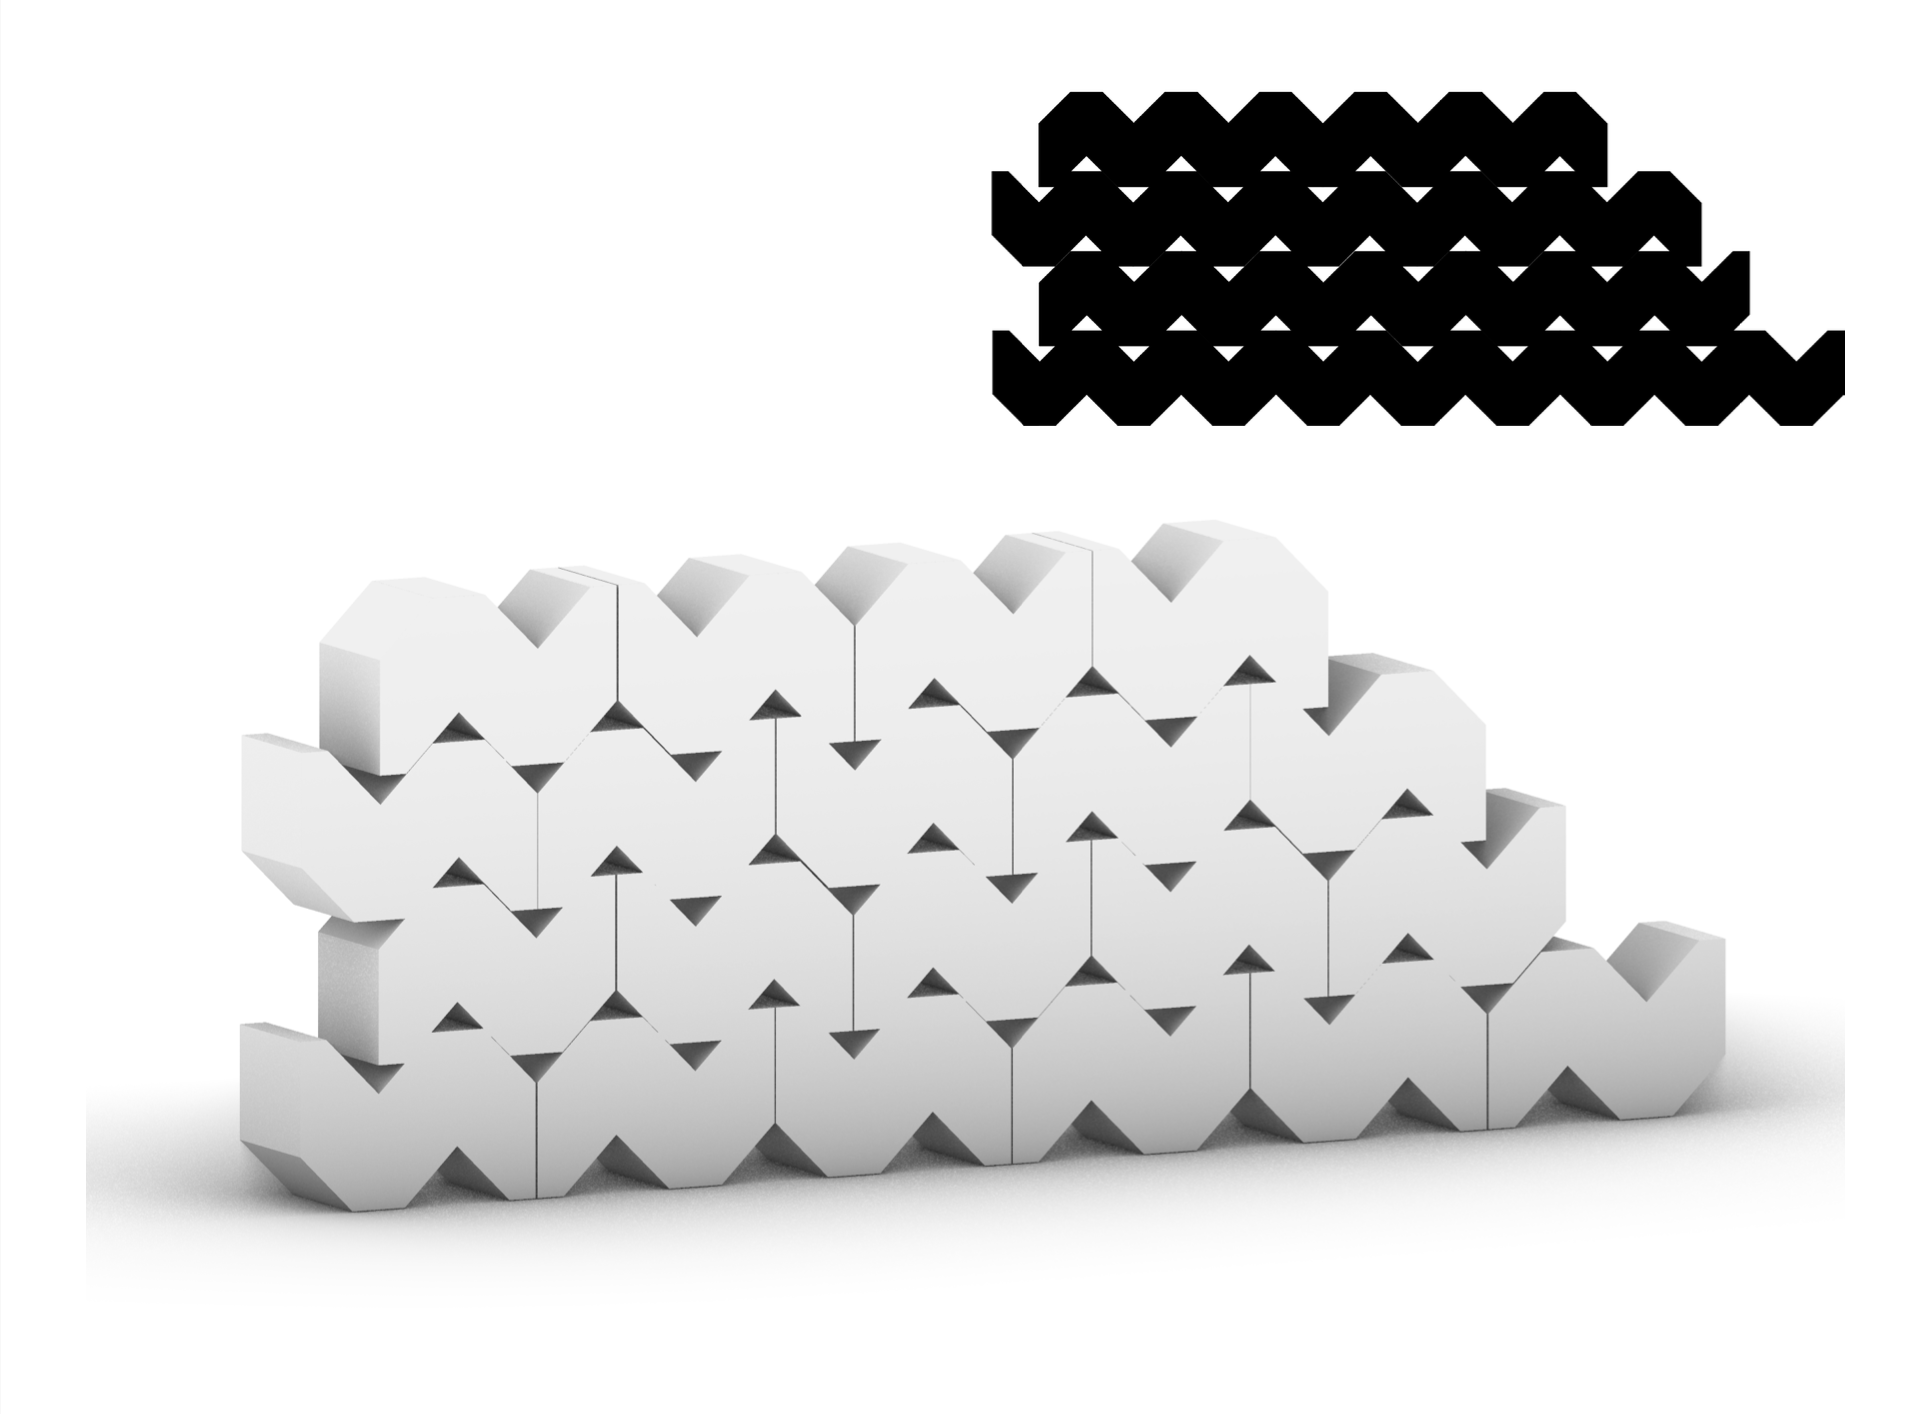
As the pieces come together in a series, each unit stacks on the one before another or stands tangent to its neighbor. Each apex fits within the crest of the unit above.
To implement a 3rd dimension, we shear the piece at an angle. The choice of width and angle of shear is intentional to maintain the balance of the unit.
Once the aggregate is formed, the shear becomes more noticeable; this element creates a “forking” feature.
Additional shear is made, requiring us to extrude the piece horizontally.
The aggregate begins to interact with light, creating a canopy and slope.
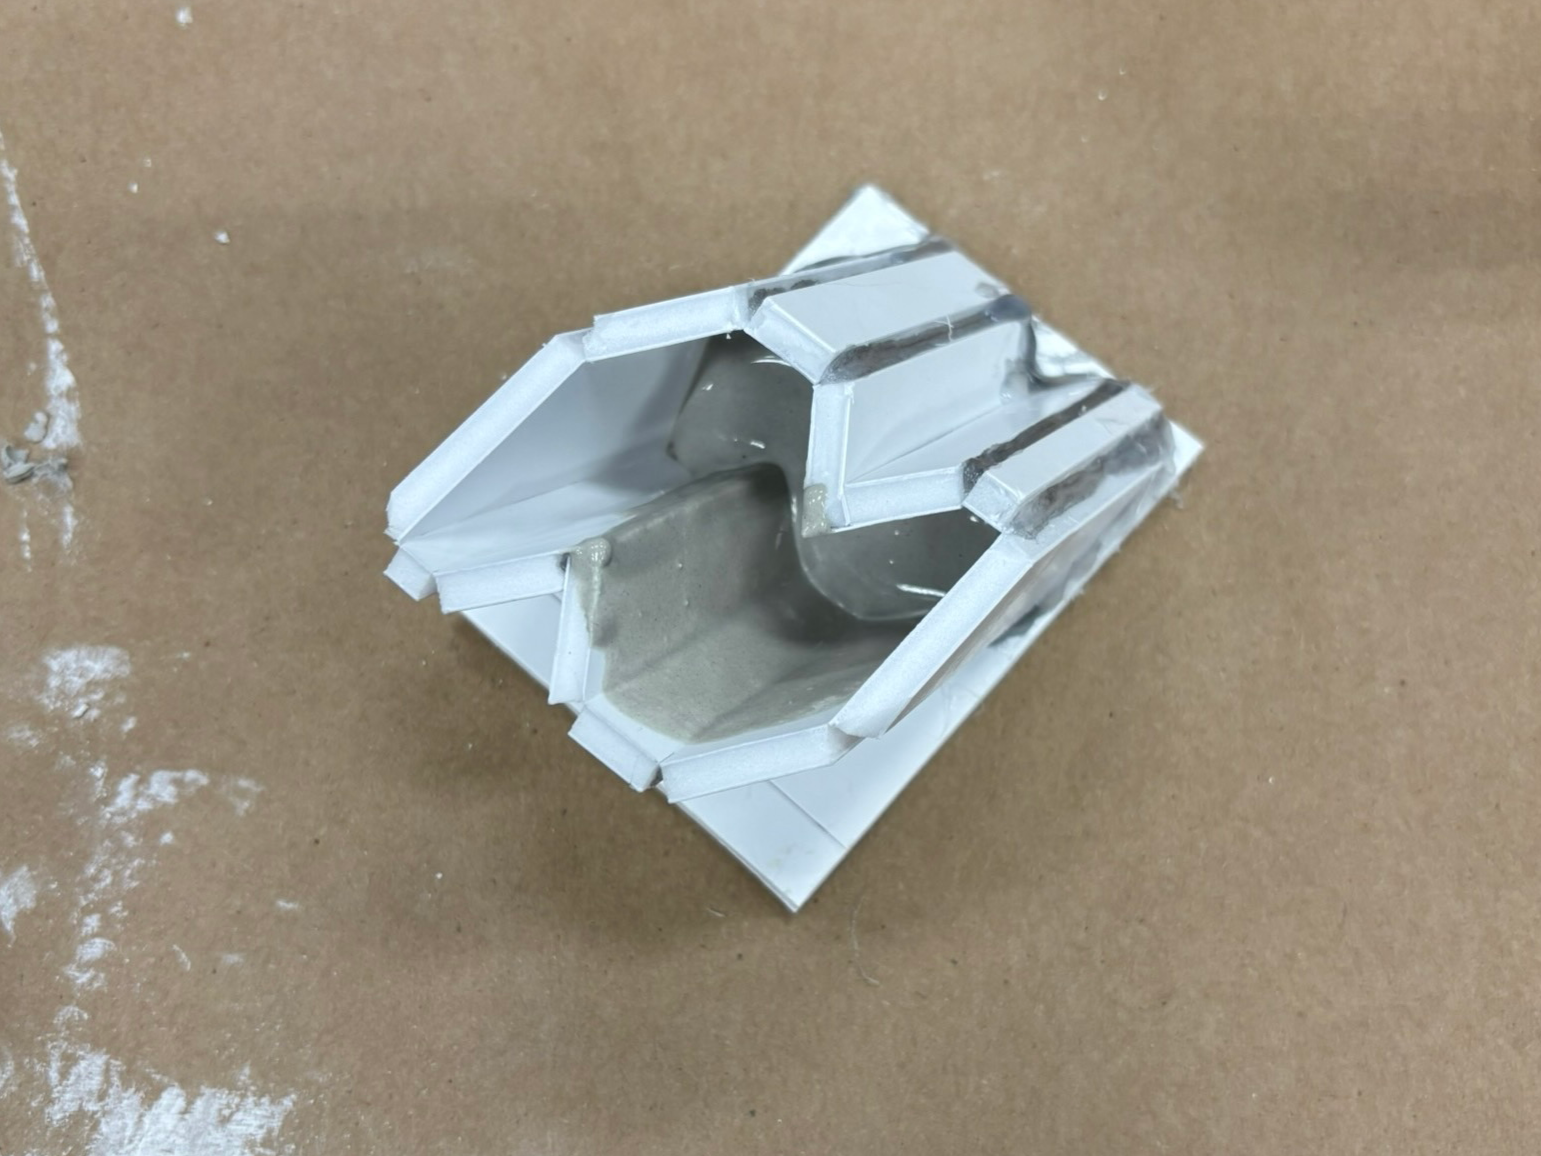
We create a guide or template to mass-produce multiple units.
Experimenting with various ways of reinforcing the perimeter by implementing “keys” or scaffolds.
The building process.
The plaster is poured at an angle to prevent as many air bubbles as possible.
The plaster is slightly overpoured to prevent any caving or textured surfaces.
Mold is torn off to reveal the unit.
